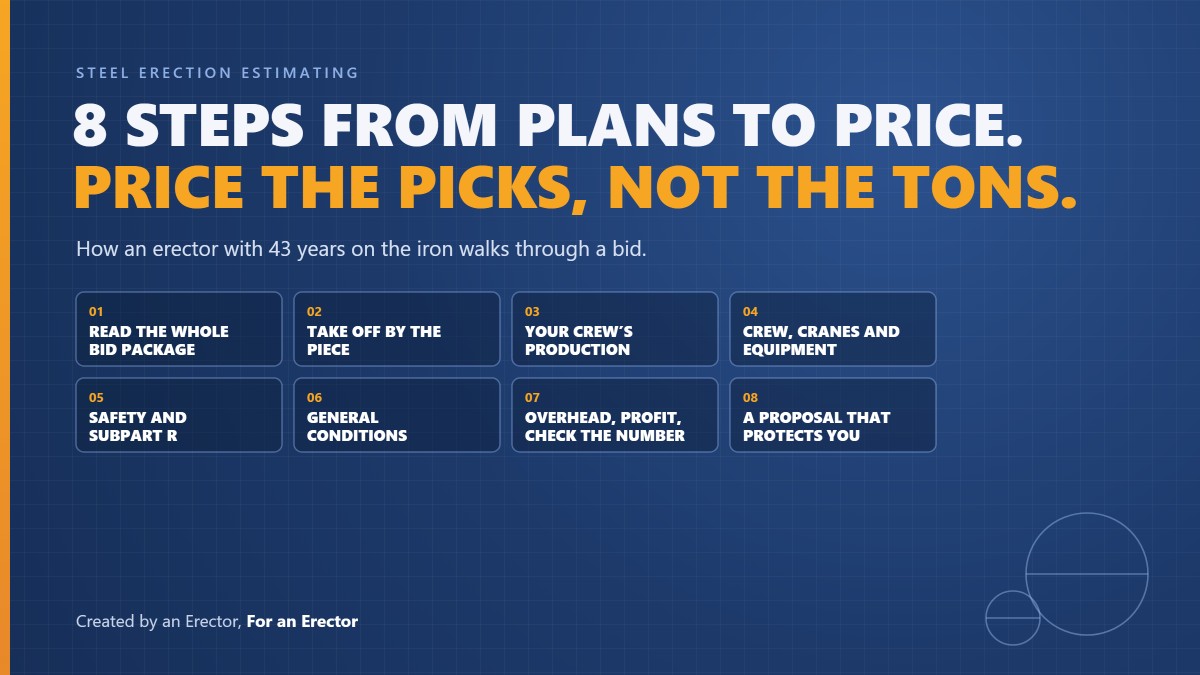
Structural steel estimating looks different when you are the one hanging the iron. A fabricator counts tons. An erector counts picks, connections, bolts and days on the hook. I started out as an apprentice ironworker in 1982, worked my way up through the field, and went on to run and estimate for a family erection company. The basics of pricing erection have not changed much in all that time. The tools have. Here is how I walk through a bid, step by step, the way I would teach it to a new estimator in my own office.
Step 1: Read the Whole Bid Package Before You Count Anything
Do not open the plans and start counting columns. Read the specs, the bid form, the schedule, the scope letter and every addendum first. Know what you are pricing before you price it.
Things I look for on the first pass:
- Who supplies what. Are you erecting only, or are deck, joists, embeds and misc metals in your scope?
- Who unloads and shakes out the steel.
- Crane responsibility and site access. Can you get a crane where it needs to be?
- Schedule and phasing. One mobilization or four?
- Union or open shop, prevailing wage, and any special safety or site requirements.
- Which drawing set you are bidding. 60%, 80% or 100%? If the set is going to change, your number needs to account for it.
Most bids are lost or made right here. If you miss a scope item on page 3 of the spec, no amount of careful counting fixes it.
Step 2: Take Off the Steel by Piece, Not by Ton
This is where a lot of people go wrong in steel estimating. Tonnage tells you what the steel weighs. It does not tell you how long it takes to set it. A heavy job with a few big members can go up fast. A light job with thousands of small pieces can eat you alive.
I price by piece count because I am touching every piece. So the takeoff should give you:
- Columns, by size and height
- Beams and girders, by size and length
- Braces, kickers and moment connections
- Joists and joist girders, if they are in your scope
- Deck, by square feet and type
- Embeds, misc metals and anything else on the scope letter
Take it off the way you erect it. I do my takeoff in the same order I would hang the building. Columns first. Then beams, girders and joists. Then any other count items. Then I go detail by detail, the same way we hang the structural steel first and then come back and detail it out. When I build an estimate that way, it is like I am connecting the building myself, touching every single piece. That is what gives me a good feel for the job before I ever put a number on it.
Do it by area or sequence if the job is phased. It makes the schedule and crane plan easier later.
I have been doing digital takeoffs since 2001. Counting pieces by hand on paper still works, but it is slow and it is where mistakes creep in. These days our AI Takeoff Wizard does the counting off the drawings, and you check its work instead of doing all of it yourself.
Step 3: Assign Production to Every Piece
Now you turn pieces into hours. Here is something a lot of people get wrong: the time it takes to set a column, hang a beam or install an angle is pretty much the same whether you are in New Mexico, Texas or California. Iron is iron. What changes from one company to the next is the cost of that hour: your wage rates, workers' comp, general liability and the rest of your burden. And what changes from one job to the next is the job itself.
That is why the production rates in the Steel Erection Bid Wizard come dialed in right out of the gate. You can bid with them on day one. If your crew runs faster or slower on a certain task, you can tweak any rate. Just tell the Bid Wizard how many of an item your crew can set in a day, and it generates the production rate for that task automatically, based on your crew size.
Then adjust for the job. Height, weather, site access, congestion, heavy picks and complicated connections all slow you down. Be honest with yourself here. Optimism on production is the most expensive mistake in this business.
Step 4: Build Your Crew and Equipment
Once you have total hours, figure out who is doing the work and what they need.
- Crew makeup: raising gang, connectors, bolt-up crew, deck crew, foreman. Size the crew to the job and the schedule.
- Labor rates: your own burdened rates, union or open shop. Build in wages, fringes, payroll taxes and insurance so the rate is what a man-hour really costs you.
- Cranes: size, how many, how long, plus mobilization, setup and operator.
- Lifts, welders, compressors, rigging, tools and consumables.
- Travel, per diem and parking if the job is out of town.
The crane is usually the biggest single cost on the job besides labor. Price it from your real duration, not a guess.
Step 5: Account for Safety and Subpart R
Your safety plan costs money, and it belongs in the bid. Fall protection, perimeter cable, safety netting where required, site-specific safety plans and any training the GC requires. OSHA Subpart R sets the rules for steel erection, and complying with it takes time and material. If you leave it out, it comes out of your profit.
Step 6: Don't Forget Your General Conditions
General conditions are the costs that don't put a single piece of steel in the air, but you pay for them on every job. Miss them and you are working for free.
- Stretch and flex every morning, on the clock.
- Safety meetings: daily toolbox talks, pre-task plans and the GC's weekly safety meeting.
- Safety cable. As the erector, you supply it and you install it. That means the cost of the cable itself goes in your bid, not just the labor to hang it.
- Site requirements: orientation, badging, drug testing and any training the GC requires.
- Foreman time on daily reports, JHAs and coordination meetings.
- Mobilization, storage, cleanup, punch list and demobilization.
- Lost time waiting on the crane, deliveries or weather.
Figure these per day and per man, then multiply by the duration. On a long job, general conditions can be one of the biggest numbers in the bid. Build a checklist and run it on every job so nothing falls off.
Step 7: Add Overhead, Profit and Check the Number
Add your overhead and your margin. Then step back and check the number against something you trust. Compare it to a similar job you have done. Look at the cost per piece and the total days. If it looks too cheap or too high, go find out why before it goes out the door.
A quick ballpark check. Here is a rule of thumb we teach new estimators in our classes when we get to the second review of a bid. Look at your cost before overhead and profit are added:
- Labor is typically 65% to 70% of it.
- Equipment usually runs 10% to 15%, and often closer to 15%.
- General conditions, small tools and consumables usually run 10% to 15%.
These are averages. It is not set in stone, and every job is a little different. But if your equipment is sitting at 25%, look hard at your crane days. If your general conditions are at 3%, you probably left out stretch and flex, safety meetings or mobilization. It will not tell you the right number. It will tell you when to look again.
This is also where you double check the drawing set. If an addendum came in after your takeoff, compare the sets and see what changed. Our Document Compare feature lists every change between drawing sets, so you are not bidding off an old revision.
Step 8: Write a Proposal That Protects You
The proposal is not just a price. It is your scope. Spell out what you include, what you exclude and what you assume. Crane responsibility, unloading, who provides survey and layout, anchor bolt tolerances, schedule assumptions and which drawings you priced. A clear proposal heads off a lot of arguments later.
How the Bid Wizard Handles Structural Steel Estimating
I built the Steel Erection Bid Wizard because I got tired of doing all of this in pieces: a takeoff here, a spreadsheet there, a proposal in Word. It started as an Excel spreadsheet in 2012 and has been cloud software since 2015. Over 40,000 bid proposals have moved through the Bid Wizard since then.
It follows the same steps I just walked you through. You enter your pieces, the Bid Wizard applies the production rates along with your crew, equipment and labor rates, and it builds the proposal with your inclusions and exclusions. If you work from a model, you can export the report from Tekla or SDS2 and import it straight into the Bid Wizard. Your numbers stay your numbers. It just keeps you from missing a step when you are three bids deep on a Friday afternoon.
Here is a short look at it in action:
You can see the full process on our How It Works page.
Bid Smarter
Steel erection estimating comes down to knowing your scope, counting every piece and being honest about your production. Do that every time and your bids will hold up. If you want to see how the Bid Wizard can take the grind out of it, book a free demo and I will walk you through it on a real bid of mine.
Created by an Erector, For an Erector.